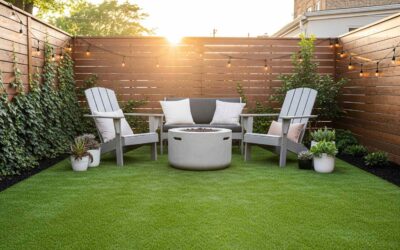
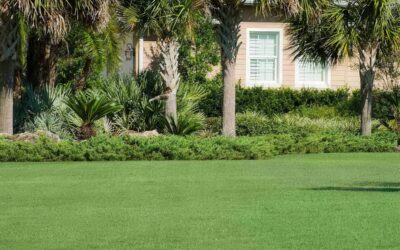
Putting green is yet another high-end option for homeowners looking to make niche landscaping, especially for their backyards. But isn’t that a high-flying lifestyle addition? It certainly is! However, you can acquire this transformation much affordably, in less time, and work on your golf game anytime.
How’s it possible? Your game may or may not be tournament ready, but with synthetic turf, your backyard can certainly make you feel like a pro. You can also create your practice set up with real grass, but that’s more of an effort and may not always be under your means.
It would help if you partner with professionals to precisely design and install your putting green while overcoming any challenges. But you can still go about the process on your own. In this blog, we’ll quickly guide you on how you can install a putting green in your backyard all by yourself.
TOOLS & MATERIALS REQUIRED
- Artificial grass carpet
- Leaf rakes
- Knives
- Garden hoses
- Lawnmower rollers
- Plate compactors
- Shovels
- Concrete pavers
- Landscape fabric
- Edging stones
- Brick, concrete, rubber, and wood edging
- Cement and concrete aggregate
- Stripping and marking spray paint
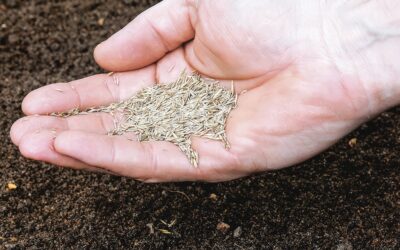
- Weed and grass killer
STEP 1 – CHOOSE A LOCATION
Searching for the right spot is the key to success. So you must place your putting green at the location where there’s better drainage, the slope’s away to prevent puddles, and the holes are away from the house, especially any windows or breakable structures. In fact, you must sketch your design to address the needs and challenges in the initial stages itself.
STEP 2 – OUTLINE THE GREEN
Once you’re done finalizing your designs and know what goes where start outlining the yard. Next, remove sod from inside this outlined space. You can cut down the grass and, with a rake, get rid of any grass clippings or other lawn debris.
STEP 3 – DIG & PREVENT WEEDS
Channel the areas inside the outline – go for around 5 inches depth and add a crushed rock base. Use a lasting and quality weed killer over bare dirt. This will make sure that weeds don’t grow back, piercing into the grass.
STEP 4 – PUT CUPS IN PLACE
Now comes the most crucial step – placing the putting green cups, so install these as per your final designs. Putting green cups usually have holes in them, but you can dig up small trenches if desired. These must lead past the greens so water, especially rainwater, can drain out quickly. Add some gravel in the channels you dug and mark the spot for easy identification later on.
STEP 5 – PREPARE THE BASE
To prep, the base for your putting green, add up some crushed stones and spread these evenly. You would need to moisten these with a garden hose and then run a compactor to flatten the base. Remove any of the stones from where the cups would go. Use a shovel or spade to make holes, and with a hand tamper, compact the rocks around. Fill any cracks or depressions with sand. To help your ball roll smoothly, ensure that at least a 3-foot radius is kept flat around each cup.
STEP 6 – PRE-SHRINK & JOIN SECTIONS
Professional-grade and durable turf that you invest in, like the one from the DFW Turf collection, would probably be sized for your needs. Still, if the manufacturer mentions, unroll the bundle and pre-shrink the same until it’s thoroughly saturated and allow the turf to dry for the next 24 – 48 hours. Follow the directions, cut and join sections, and ensure the nap runs equally in all of those.
STEP 7 – INSTALL & SECURE TURF
Now comes the final step, i.e., to place and secure your turf over the crushed stone base. Next, carefully trim out the decided shape and size with a utility knife. Press down the grass to find the cups and cut those holes out as well. It’s even better if you drop down the cut pieces at the bottom of the cups to make these easy to clean. A proper drainage system will ensure that washing out is effortless. Once you’re done with cutting and proper placement, hold down the grass with landscape stapes or turf pegs. If not these, follow the manufacturer’s instructions to secure your synthetic grass.
STEP 8 – INSTALL BORDER
Now is the time to add a border around the putting green (if you wish to). A retaining wall or edging will work best. If desired, the landscape around the green and place a chipping mat to prevent any damage to your real grass.
THE LONG HAUL
Well, the above steps tell you how you can easily DIY a putting green in your backyard. Congratulations on laying your practice setup! But that’s not all – you need to also care for the turf. So keep your sweeping and hosing efforts regular to keep up with its maintenance. This is one of those projects that will never stop!
NEED PROFESSIONAL ASSISTANCE? CONTACT DFW TURF SOLUTIONS IN TEXAS!
The secret to creating high quality and practical synthetic putting green space lies in its installation process. We at DFW Turf Solutions have mastered these techniques, so it lasts for years to come. Our expertise allows us to install putting greens that stimulate the look and feel of the space while ensuring its durable as well as low maintenance.
If you’re interested in developing your very own backyard putting green, call for professional help as it’ll assist you to put off all slip-ups with your project. At DFW Turf, we assure affordable pricing, designs that are totally in tune with your vision, and realistic results.
Call us today at 940-310-3263 and schedule your consultation. You can also write to us, and we’ll get back to you shortly. For more information, check out our Golf and Putt services page. We’re one of the most trusted synthetic grass companies in Texas, and clients swear by our work. If you choose to hire us, rest assured, you won’t be disappointed.

Bennett Barrier is the CEO of Turf Solutions, a leading provider of high-quality artificial turf installations across the United States. With extensive experience in the artificial turf industry, Bennett has established himself as a trusted expert in the artificial turf industry, business operations, and management. His leadership has been integral to Turf Solutions’ growth and success, providing innovative, eco-friendly alternatives for both residential and commercial applications. Passionate about small business management, Bennett is committed to creating efficient, customer-focused operations that deliver exceptional results. Through his strategic vision and hands-on approach, he continues to drive the company forward, ensuring it remains at the forefront of the artificial turf industry.